
I saw this little cutie digi stamp at Prairie Fairy Designs and just loved it. I paper pieced her dress, arms, shoes, hair, glasses and soother, then I gave her sparkly earrings. I kept adding different things to the card, flowers, stars, etc., thinking it needed something more, but I didn't think they made it look better so I left it as is. I decided to add a paper bow instead of ribbon to this one. Further down is my version of a tutorial to show you how I made it.

Paper Bow Tutorial
 Cut a length of card stock 8.5" long and as wide as you like, mine is half an inch wide. This will give you a bow that is just under 3.5" long.
 Fold in half
 Fold as shown above
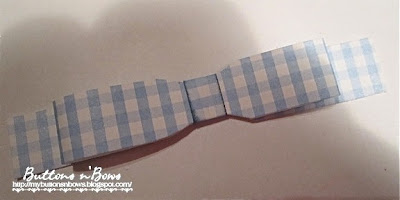
 On the back join with a small piece of tape (notice that the 2 ends are a little longer than the middle part)
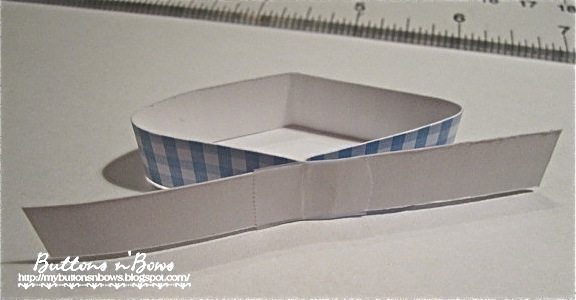
 Now cut out a semi circle piece from the centre, do this on each side as shown
 Cut out a small piece of cardstock that is long enough to wrap around the middle and overlap on the back. I inked the edges with distress ink to give it some definition.
 Now wrap the small band around the centre and attach at the back with a glue dot.
 Cut a small triangle out of each end as shown and ink with distress ink.
 This is what I did for the card above, you need to cut out some of the c/s in the middle so that it doesn't show under the bow. Now glue the bow onto the flat piece and puff it up a bit with your fingers.
 The finished bow
I haven't done many tutorials, so hope my explanations and pictures are easy to follow.
Thanks for visiting my blog, have a good night all!


Paper Bow Tutorial


I haven't done many tutorials, so hope my explanations and pictures are easy to follow.
Thanks for visiting my blog, have a good night all!
1 comment :
Thank you for this tutorial - this is very helpful for me!!
Hugs
Post a Comment